We recommend saving as a .PDF. You may also send the file in the following types: jpg, jpeg, tif, tiff, eps, and png. We prefer that you send .PDF with embedded or outlined fonts. .PDF's are easier to handle and will likely speed up your turn-around. Remember to add crop marks and flatten your files before uploading.
2) WHAT COLOR MODE SHOULD MY FILE BE?
A: CMYK
If you send us an RGB file, there is a chance that a color shift may occur and you may not be satisfied with your job.
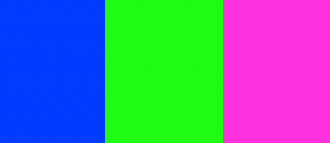
THESE COLORS ARE IN RGB
THESE ARE THE SAME COLORS BUT IN CMYK
You should always start and finish your designs in CMYK color mode.
3) WHAT RESOLUTIONS SHOULD MY FILE BE?
A: 300 dpi for Digital Press Printing A: 150 dpi for Large Format Printing Low resolution files may be printed as is or will be placed on hold until we receive new files, slowing your turn-around.
We only accept 300 dpi files and no less.
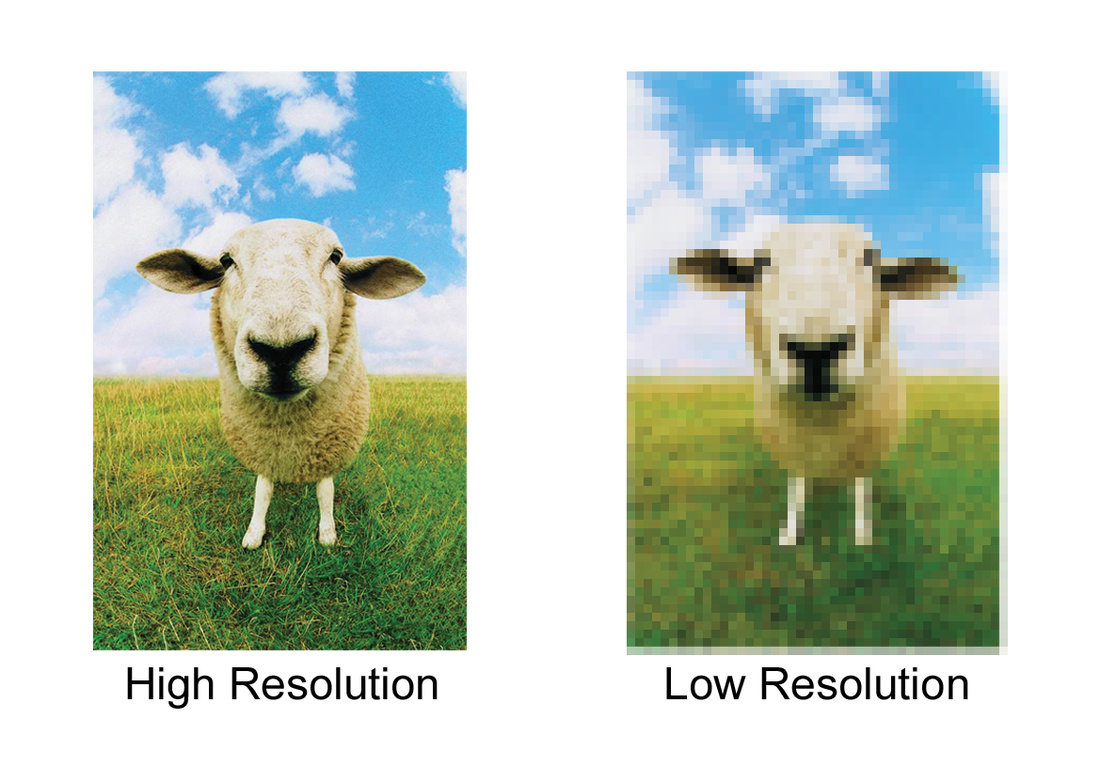
4) Can I Change a Low Resolution Image to High Resolution?
A: No, you cannot change a low resolution to be high resolution in graphic design. There is no way to add pixels to a low resolution image.
High resolution is 300 dpi (dots per inch), whereas low resolution pictures are less than 300 dpi. Images that are in high resolution provide a clearer picture, due to the concentrated and tight combination of dots per inch. Conversely, you’ll notice dots more on a low resolution image and the picture won’t be as clear. In graphic design, low resolution images are going to look pixelated, blurry and not as clear-cut as high resolution images. High resolution images are needed for print design in order to produce crisp, clear images. Lower resolution images can be used for websites and social media.
5) HOW SHOULD I SET UP MY BLEEDS
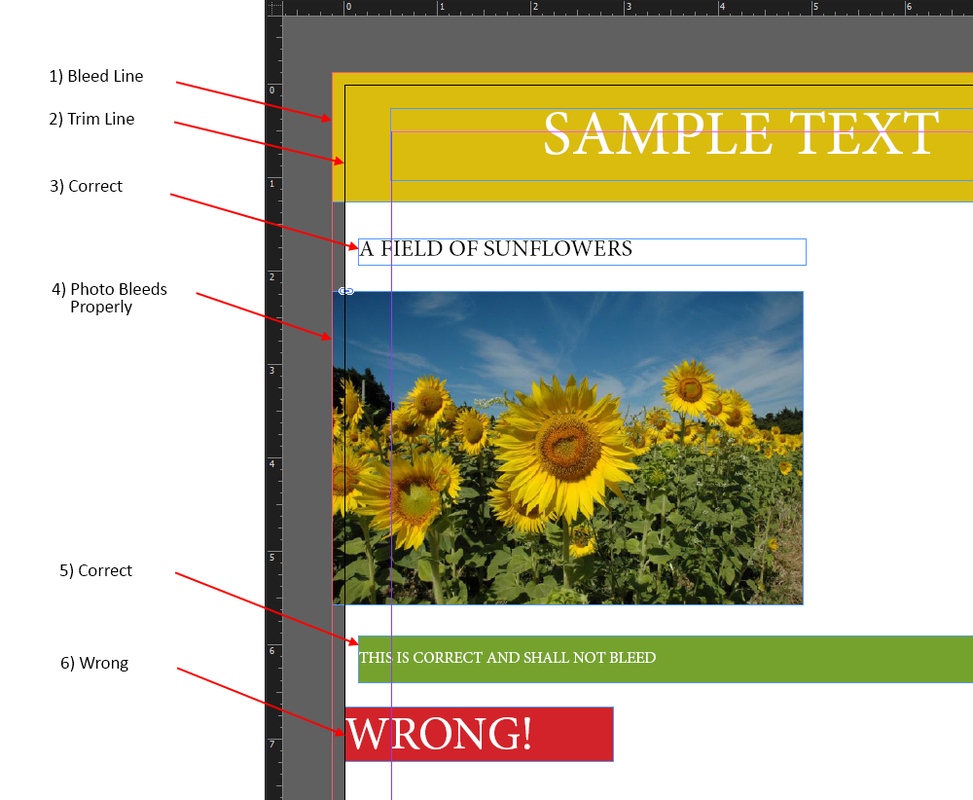
Bleed Line – the red bleed line indicates where your photos, illustrations, and objects must extend to in order for your document to have proper bleeds. In this case, the mustard colored box at the top must extend to the left, top, and right (not shown) bleed line.
Trim Line – the black trim line indicates where the document’s final cut will be, and this will be the edge of your finished piece.
Correct Placement of Text – be sure to place text (and other objects) that you don’t want to bleed at least 1/8″ inside the trim line to avoid the possibility of these elements from being unintentionally clipped during cutting.
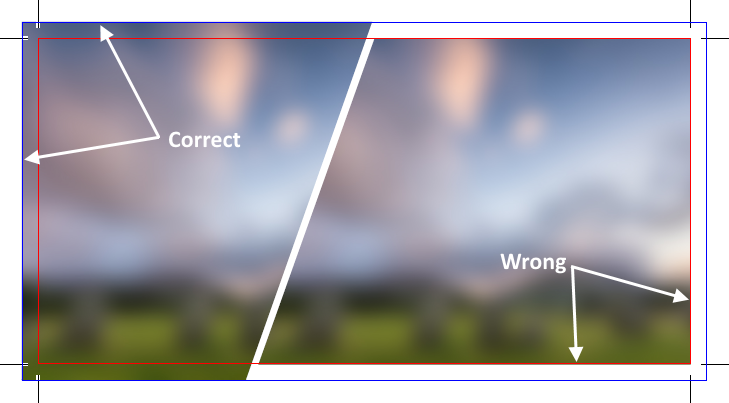
Photos that Bleed – extend photos beyond the trim line and all the way to the bleed line.
Non-Bleeding Object – Once again, be sure to place text (and other objects) that you don’t want to bleed at least 1/8″ inside the trim line to avoid the possibility of these elements from being unintentionally clipped during cutting.
Improperly Bleeding Object – DO NOT place objects right up against the trim line. These objects will most likely not bleed or will be clipped during cutting. This is the opposite of a proper bleed setup!
MORE INFO. COMING SOON PLEASE SEND US A MESSAGE IF YOU HAVE ANY QUESTIONS.